kubenews #1
2020-11-27
配信URL
各タイトルを押していただくことで、実際の記事に飛びます。
Edge Computing with openness
- kubeweekly
- 今後、ますます使い道が増えていくであろうEdge ComputingについてのKubernetes活用方の紹介
- 個人的には、2019年にwalmartの話を聞いてから、edge-computingにおけるkubernetesの活用に意識が向きはじめた。
- kubeedgeというものも増えていた。
kubectl logsのデフォルトコンテナを指定
- すぱぶらさんによる投稿
- これまで、ずっと「kubectl logs ~ -c
」 - kubernetes 1.18から、annotationに
kubectl.kubernetes.io/default-logs-container: container nameを用いることで、-cで指定しない際のデフォルトのコンテナを選択できるようになった。
Chaos Engineering tools comparison
- Chaos Engineeringの比較について書かれている。
- GremlinというChaos Engineering Toolについて書かれている記事
kubelinter
kubelinterとは
Installation
まず、cliツールを使えるようにします。
# curl -LO https://github.com/stackrox/kube-linter/releases/download/0.1.3/kube-linter-linux.tar.gz
# tar -xvf kube-linter-linux.tar.gz
# mv kube-linter /usr/local/bin

# kube-linter version
0.1.3
実践
では、以下のmanifestを確認していきます。
apiVersion: apps/v1
kind: Deployment
metadata:
  name: nginx-lint-test
  namespace: default
  labels:
    app: nginx
spec:
  replicas: 1
  selector:
    matchLabels:
      app: nginx
  template:
    metadata:
      labels:
        app: nginx
    spec:
      containers:
        - name: nginx
          image: nginx
          imagePullPolicy: IfNotPresent
          ports:
            - name: http
              containerPort: 80
              protocol: TCP
          livenessProbe:
            httpGet:
              path: /
              port: 80
          readinessProbe:
            httpGet:
              path: /
              port: 80
kube-linter lintコマンドで確認ができます。
# kube-linter lint nginx.yaml
nginx.yaml: (object: default/nginx-lint-test apps/v1, Kind=Deployment) container "nginx" does not have a read-only root file system (check: no-read-only-root-fs, remediation: Set readOnlyRootFilesystem to true in your container's securityContext.)

nginx.yaml: (object: default/nginx-lint-test apps/v1, Kind=Deployment) container "nginx" is not set to runAsNonRoot (check: run-as-non-root, remediation: Set runAsUser to a non-zero number, and runAsNonRoot to true, in your pod or container securityContext. See https://kubernetes.io/docs/tasks/configure-pod-container/security-context/ for more details.)

nginx.yaml: (object: default/nginx-lint-test apps/v1, Kind=Deployment) container "nginx" has cpu request 0 (check: unset-cpu-requirements, remediation: Set your container's CPU requests and limits depending on its requirements. See https://kubernetes.io/docs/concepts/configuration/manage-resources-containers/#requests-and-limits for more details.)

nginx.yaml: (object: default/nginx-lint-test apps/v1, Kind=Deployment) container "nginx" has cpu limit 0 (check: unset-cpu-requirements, remediation: Set your container's CPU requests and limits depending on its requirements. See https://kubernetes.io/docs/concepts/configuration/manage-resources-containers/#requests-and-limits for more details.)

nginx.yaml: (object: default/nginx-lint-test apps/v1, Kind=Deployment) container "nginx" has memory request 0 (check: unset-memory-requirements, remediation: Set your container's memory requests and limits depending on its requirements. See https://kubernetes.io/docs/concepts/configuration/manage-resources-containers/#requests-and-limits for more details.)

nginx.yaml: (object: default/nginx-lint-test apps/v1, Kind=Deployment) container "nginx" has memory limit 0 (check: unset-memory-requirements, remediation: Set your container's memory requests and limits depending on its requirements. See https://kubernetes.io/docs/concepts/configuration/manage-resources-containers/#requests-and-limits for more details.)

Error: found 6 lint errors
今回のmanifestにおいて、以下のことを注意されています。
- readOnlyRootFilesystemの設定がない
- runAsNonRootが設定されていない
- cpu request/limit が設定されていない
- memory request/limit が設定されていない
チェックする項目は、以下のコマンドで確認することができます。 ただ、resource requirementはあるものの、limitがないなどまだ完璧ではなさそうです。
# kube-linter checks list
Name: dangling-service
Description: Alert on services that don't have any matching deployments
Remediation: Make sure your service's selector correctly matches the labels on one of your deployments.
Template: dangling-service
Parameters: map[]
Enabled by default: true

------------------------------

Name: default-service-account
Description: Alert on pods that use the default service account
Remediation: Create a dedicated service account for your pod. See https://kubernetes.io/docs/tasks/configure-pod-container/configure-service-account/ for more details.
Template: service-account
Parameters: map[serviceAccount:^(|default)$]
Enabled by default: false

------------------------------

Name: deprecated-service-account-field
Description: Alert on deployments that use the deprecated serviceAccount field
Remediation: Use the serviceAccountName field instead of the serviceAccount field.
Template: deprecated-service-account-field
Parameters: map[]
Enabled by default: true

------------------------------

Name: env-var-secret
Description: Alert on objects using a secret in an environment variable
Remediation: Don't use raw secrets in an environment variable. Instead, either mount the secret as a file or use a secretKeyRef. See https://kubernetes.io/docs/concepts/configuration/secret/#using-secrets for more details.
Template: env-var
Parameters: map[name:(?i).*secret.* value:.+]
Enabled by default: true

------------------------------

Name: mismatching-selector
Description: Alert on deployments where the selector doesn't match the pod template labels
Remediation: Make sure your deployment's selector correctly matches the labels in its pod template.
Template: mismatching-selector
Parameters: map[]
Enabled by default: true

------------------------------

Name: no-anti-affinity
Description: Alert on deployments with multiple replicas that don't specify inter pod anti-affinity to ensure that the orchestrator attempts to schedule replicas on different nodes
Remediation: Specify anti-affinity in your pod spec to ensure that the orchestrator attempts to schedule replicas on different nodes. You can do this by using podAntiAffinity, specifying a labelSelector that matches pods of this deployment, and setting the topologyKey to kubernetes.io/hostname. See https://kubernetes.io/docs/concepts/scheduling-eviction/assign-pod-node/#inter-pod-affinity-and-anti-affinity for more details.
Template: anti-affinity
Parameters: map[minReplicas:2]
Enabled by default: true

------------------------------

Name: no-extensions-v1beta
Description: Alert on objects using deprecated API versions under extensions v1beta
Remediation: Migrate to using the apps/v1 API versions for these objects. See https://kubernetes.io/blog/2019/07/18/api-deprecations-in-1-16/ for more details.
Template: disallowed-api-obj
Parameters: map[group:extensions version:v1beta.+]
Enabled by default: true

------------------------------

Name: no-liveness-probe
Description: Alert on containers which don't specify a liveness probe
Remediation: Specify a liveness probe in your container. See https://kubernetes.io/docs/tasks/configure-pod-container/configure-liveness-readiness-startup-probes/ for more details.
Template: liveness-probe
Parameters: map[]
Enabled by default: false

------------------------------

Name: no-read-only-root-fs
Description: Alert on containers not running with a read-only root filesystem
Remediation: Set readOnlyRootFilesystem to true in your container's securityContext.
Template: read-only-root-fs
Parameters: map[]
Enabled by default: true

------------------------------

Name: no-readiness-probe
Description: Alert on containers which don't specify a readiness probe
Remediation: Specify a readiness probe in your container. See https://kubernetes.io/docs/tasks/configure-pod-container/configure-liveness-readiness-startup-probes/ for more details.
Template: readiness-probe
Parameters: map[]
Enabled by default: false

------------------------------

Name: non-existent-service-account
Description: Alert on pods referencing a service account that isn't found
Remediation: Make sure to create the service account, or to refer to an existing service account.
Template: non-existent-service-account
Parameters: map[]
Enabled by default: true

------------------------------

Name: privileged-container
Description: Alert on deployments with containers running in privileged mode
Remediation: Don't run your container as privileged unless required.
Template: privileged
Parameters: map[]
Enabled by default: true

------------------------------

Name: required-annotation-email
Description: Alert on objects without an 'email' annotation with a valid email
Remediation: Add an email annotation to your object with the contact information of the object's owner.
Template: required-annotation
Parameters: map[key:email value:[a-zA-Z0-9_.+-]+@[a-zA-Z0-9-]+\.[a-zA-Z0-9-.]+]
Enabled by default: false

------------------------------

Name: required-label-owner
Description: Alert on objects without the 'owner' label
Remediation: Add an email annotation to your object with information about the object's owner.
Template: required-label
Parameters: map[key:owner]
Enabled by default: false

------------------------------

Name: run-as-non-root
Description: Alert on containers not set to runAsNonRoot
Remediation: Set runAsUser to a non-zero number, and runAsNonRoot to true, in your pod or container securityContext. See https://kubernetes.io/docs/tasks/configure-pod-container/security-context/ for more details.
Template: run-as-non-root
Parameters: map[]
Enabled by default: true

------------------------------

Name: unset-cpu-requirements
Description: Alert on containers without CPU requests and limits set
Remediation: Set your container's CPU requests and limits depending on its requirements. See https://kubernetes.io/docs/concepts/configuration/manage-resources-containers/#requests-and-limits for more details.
Template: cpu-requirements
Parameters: map[lowerBoundMillis:0 requirementsType:any upperBoundMillis:0]
Enabled by default: true

------------------------------

Name: unset-memory-requirements
Description: Alert on containers without memory requests and limits set
Remediation: Set your container's memory requests and limits depending on its requirements. See https://kubernetes.io/docs/concepts/configuration/manage-resources-containers/#requests-and-limits for more details.
Template: memory-requirements
Parameters: map[lowerBoundMB:0 requirementsType:any upperBoundMB:0]
Enabled by default: true

------------------------------

Name: writable-host-mount
Description: Alert on containers that mount a host path as writable
Remediation: If you need to access files on the host, mount them as readOnly.
Template: writable-host-mount
Parameters: map[]
Enabled by default: false
意図的に、チェック項目を回避する場合は、Annotationに次の項目を記載することで対応できます。
ignore-check.kube-linter.io/<check-name>
今回、resourceに対するrequirement/limitをチェックしないように設定します。
apiVersion: apps/v1
kind: Deployment
metadata:
  name: nginx-lint-test
  namespace: default
  labels:
    app: nginx
  annotations:
    ignore-check.kube-linter.io/unset-memory-requirements: ""
    ignore-check.kube-linter.io/unset-memory-limits: ""
    ignore-check.kube-linter.io/unset-cpu-requirements: ""
    ignore-check.kube-linter.io/unset-cpu-limits: ""
再度、kube-linterコマンドを実施します。
# kube-linter lint nginx.yaml
nginx.yaml: (object: default/nginx-lint-test apps/v1, Kind=Deployment) container "nginx" does not have a read-only root file system (check: no-read-only-root-fs, remediation: Set readOnlyRootFilesystem to true in your container's securityContext.)

nginx.yaml: (object: default/nginx-lint-test apps/v1, Kind=Deployment) container "nginx" is not set to runAsNonRoot (check: run-as-non-root, remediation: Set runAsUser to a non-zero number, and runAsNonRoot to true, in your pod or container securityContext. See https://kubernetes.io/docs/tasks/configure-pod-container/security-context/ for more details.)

Error: found 2 lint errors
ちゃんと設定した4つ分減ったことを確認できました。
最後に
CIにおけるテストに統合するなど、様々な使い方が期待できそうですね!
入門 vcluster
What's vcluster
今回ご紹介させていただくのは、Virtual Clusters For Kubernetesを実現するvclusterです!
既存のkubernetes上で簡単に仮想的なkubernetes clusterを構築することができます。
Architecture

Basics | vcluster docs | Virtual Clusters for Kubernetes
主なコンポーネントとしては以下の2つです。
以下のコンポーネントは、stateful-setによってスケジューリングされるpodの中に2つのコンテナとして作成されます。
- control-plane:
- syncer:
- vcluster上のPod等のリソースは、ホストクラスター上でcontrol-planeを展開したNamespace上に集約されます。syncerはその仮想cluster上のポッドとhost cluster上のポッドの同期を維持します。
Installation
Download vcluster CLI
まず、vcluster cliを導入していきます。
# curl -s -L "https://github.com/loft-sh/vcluster/releases/latest" | sed -nE 's!.*"([^"]*vcluster-linux-amd64)".*!https://github.com\1!p' | xargs -n 1 curl -L -o vcluster && chmod +x vcluster;
sudo mv vcluster /usr/local/bin;
Create a vcluster
準備はこれだけです。 では、以下のコマンドを実行しましょう。
※ こちらを用いる際、helmをインストールしておいてください。
# vcluster create vcluster-1 -n vcluster-system
kubectlでインストールする場合は、こちらのmanifestを利用してください。
▸ vcluster.yaml (clickして展開)
apiVersion: v1
kind: ServiceAccount
metadata:
  name: vcluster-1
---
kind: Role
apiVersion: rbac.authorization.k8s.io/v1
metadata:
  name: vcluster-1
rules:
  - apiGroups: [""]
    resources: ["configmaps", "secrets", "services", "services/proxy", "pods", "pods/proxy", "pods/attach", "pods/portforward", "pods/exec", "pods/log", "events", "endpoints", "persistentvolumeclaims"]
    verbs: ["*"]
  - apiGroups: ["networking.k8s.io"]
    resources: ["ingresses"]
    verbs: ["*"]
  - apiGroups: [""]
    resources: ["namespaces"]
    verbs: ["get", "list", "watch"]
  - apiGroups: ["apps"]
    resources: ["statefulsets"]
    verbs: ["get", "list", "watch"]
---
kind: RoleBinding
apiVersion: rbac.authorization.k8s.io/v1
metadata:
  name: vcluster-1
subjects:
  - kind: ServiceAccount
    name: vcluster-1
roleRef:
  kind: Role
  name: vcluster-1
  apiGroup: rbac.authorization.k8s.io
---
apiVersion: v1
kind: Service
metadata:
  name: vcluster-1
spec:
  type: ClusterIP
  ports:
    - name: https
      port: 443
      targetPort: 8443
      protocol: TCP
  selector:
    app: vcluster-1
---
apiVersion: v1
kind: Service
metadata:
  name: vcluster-1-headless
spec:
  ports:
    - name: https
      port: 443
      targetPort: 8443
      protocol: TCP
  clusterIP: None
  selector:
    app: vcluster-1
---
apiVersion: apps/v1
kind: StatefulSet
metadata:
  name: vcluster-1
  labels:
    app: vcluster-1
spec:
  serviceName: vcluster-1-headless
  replicas: 1
  selector:
    matchLabels:
      app: vcluster-1
  template:
    metadata:
      labels:
        app: vcluster-1
    spec:
      terminationGracePeriodSeconds: 10
      serviceAccountName: vcluster-1
      containers:
      - image: rancher/k3s:v1.19.5-k3s2
        name: virtual-cluster
        command:
          - "/bin/k3s"
        args:
          - "server"
          - "--write-kubeconfig=/k3s-config/kube-config.yaml"
          - "--data-dir=/data"
          - "--disable=traefik,servicelb,metrics-server,local-storage"
          - "--disable-network-policy"
          - "--disable-agent"
          - "--disable-scheduler"
          - "--disable-cloud-controller"
          - "--flannel-backend=none"
          - "--kube-controller-manager-arg=controllers=*,-nodeipam,-nodelifecycle,-persistentvolume-binder,-attachdetach,-persistentvolume-expander,-cloud-node-lifecycle"
          - "--service-cidr=10.96.0.0/12"
        volumeMounts:
          - mountPath: /data
            name: data
      - name: syncer
        image: "loftsh/virtual-cluster:0.0.27"
        args:
          - --service-name=vcluster-1
          - --suffix=vcluster-1
          - --owning-statefulset=vcluster-1
          - --out-kube-config-secret=vcluster-1
        volumeMounts:
          - mountPath: /data
            name: data
  volumeClaimTemplates:
    - metadata:
        name: data
      spec:
        accessModes: [ "ReadWriteOnce" ]
        resources:
          requests:
            storage: 5Gi
namespaceを作成してからapplyしていきます。
# kubectl create ns vcluster-system
namespace/vcluster-system created

# kubectl apply -f vcluster.yaml -n vcluster-system
serviceaccount/vcluster-1 created
role.rbac.authorization.k8s.io/vcluster-1 created
rolebinding.rbac.authorization.k8s.io/vcluster-1 created
service/vcluster-1 created
service/vcluster-1-headless created
statefulset.apps/vcluster-1 created
では、リソースができているか確認していきます。
# kubectl get pods,svc -n vcluster-system -o wide
NAME                                                      READY   STATUS    RESTARTS   AGE   IP           NODE                   NOMINATED NODE   READINESS GATES
pod/coredns-66c464876b-98ln7-x-kube-system-x-vcluster-1   1/1     Running   0          42h   172.17.0.4   minikube.mydom.local   <none>           <none>
pod/vcluster-1-0                                          2/2     Running   1          42h   172.17.0.3   minikube.mydom.local   <none>           <none>

NAME                                          TYPE        CLUSTER-IP       EXTERNAL-IP   PORT(S)                  AGE   SELECTOR
service/kube-dns-x-kube-system-x-vcluster-1   ClusterIP   10.107.141.148   <none>        53/UDP,53/TCP,9153/TCP   42h   <none>
service/vcluster-1                            ClusterIP   10.96.161.85     <none>        443/TCP                  42h   app=vcluster-1
service/vcluster-1-headless                   ClusterIP   None             <none>        443/TCP                  42h   app=vcluster-1
Connect to the cluster
では接続していきたいと思います。
# vcluster connect vcluster-1 -n vcluster-system --local-port 9443 --kube-config vcluster.yaml &
[1] 9589
[done] √ Virtual cluster kube config written to: ./kubeconfig.yaml. You can access the cluster via `kubectl --kubeconfig ./kubeconfig.yaml get namespaces`
[info]   Starting port forwarding: kubectl port-forward --namespace vcluster-system vcluster-1-0 9443:8443
Forwarding from 127.0.0.1:9443 -> 8443
見ていただければわかると思いますが、裏で kubectl port-forward をしています。
以下のようなルールで書きます。
vcluster connect [cluster名] -n [control-planeがいるnamespace] --local-port [port-forwardするlocal port] --kube-config <kubeconfig ファイル名> &
では、実際に仮想clusterに接続していきます。
# kubectl get namespace --kubeconfig vcluster.yaml
Handling connection for 9443
NAME              STATUS   AGE
default           Active   43h
kube-system       Active   43h
kube-public       Active   43h
kube-node-lease   Active   43h
先ほど作成した、vcluster-system namespaceは見えてきてないですね!
Create resources
では、実際にリソースを作成していきたいと思います。
まずnamespaceを作成していきます。
# kubectl create ns demo1 --kubeconfig vcluster.yaml
仮想clusterでは作成され、host cluster側には当然見えてきてないです。
/// host cluster
# kubectl get ns
NAME              STATUS   AGE
default           Active   119d
kube-node-lease   Active   119d
kube-public       Active   119d
kube-system       Active   119d
vcluster-system   Active   2d

/// 仮想cluster
# kubectl get ns --kubeconfig vcluster.yaml
NAME              STATUS   AGE
default           Active   2d
kube-system       Active   2d
kube-public       Active   2d
kube-node-lease   Active   2d
demo1             Active   93m
では、default と demo1 の2つのnamespaceにリソースを作成していきます。
kubectl create deploy nginx --image=nginx:1.19.5 --replicas=5 --kubeconfig vcluster.yaml
kubectl create deploy nginx --image=nginx:1.19.5 --replicas=3 -n demo1 --kubeconfig vcluster.yaml
以下の通り作成されました。
# kubectl get pods -n default -n default --kubeconfig vcluster.yaml
NAME                     READY   STATUS    RESTARTS   AGE
nginx-7c4b6d99fd-sjnh2   1/1     Running   0          89m
nginx-7c4b6d99fd-r2rsh   1/1     Running   0          89m
nginx-7c4b6d99fd-7z6wx   1/1     Running   0          89m
nginx-7c4b6d99fd-4srv2   1/1     Running   0          89m
nginx-7c4b6d99fd-m5t62   1/1     Running   0          89m

# kubectl get pods -n default -n demo1 --kubeconfig vcluster.yaml
NAME                     READY   STATUS    RESTARTS   AGE
nginx-7c4b6d99fd-v67kb   1/1     Running   0          89m
nginx-7c4b6d99fd-wwswz   1/1     Running   0          89m
nginx-7c4b6d99fd-lbjdw   1/1     Running   0          89m
では、host clusterではどう見えているのか確認してみましょう。
# kubectl get pod -n vcluster-system
NAME                                                  READY   STATUS    RESTARTS   AGE
coredns-66c464876b-98ln7-x-kube-system-x-vcluster-1   1/1     Running   0          2d
nginx-7c4b6d99fd-4srv2-x-default-x-vcluster-1         1/1     Running   0          95m
nginx-7c4b6d99fd-7z6wx-x-default-x-vcluster-1         1/1     Running   0          95m
nginx-7c4b6d99fd-lbjdw-x-demo1-x-vcluster-1           1/1     Running   0          95m
nginx-7c4b6d99fd-m5t62-x-default-x-vcluster-1         1/1     Running   0          95m
nginx-7c4b6d99fd-r2rsh-x-default-x-vcluster-1         1/1     Running   0          95m
nginx-7c4b6d99fd-sjnh2-x-default-x-vcluster-1         1/1     Running   0          95m
nginx-7c4b6d99fd-v67kb-x-demo1-x-vcluster-1           1/1     Running   0          95m
nginx-7c4b6d99fd-wwswz-x-demo1-x-vcluster-1           1/1     Running   0          95m
vcluster-1-0                                          2/2     Running   1          2d
最初の方に説明した通り、仮想clusterで作成されたリソースが、control-planeのいるnamespaceに集約されていることがわかるかと思います。
[pod名]-x-[namespace名]-x-[vcluster名] という規則で作成されていることがわかります。
etc...
その他のリソースもどうなっているのか見ていきましょう。
service
サービスもPodと同様な規則でhost cluster側では見えてきます。
/// host cluster
# kubectl get service -n vcluster-system
NAME                                  TYPE        CLUSTER-IP       EXTERNAL-IP   PORT(S)                  AGE
kube-dns-x-kube-system-x-vcluster-1   ClusterIP   10.107.141.148   <none>        53/UDP,53/TCP,9153/TCP   47h
vcluster-1                            ClusterIP   10.96.161.85     <none>        443/TCP                  47h
vcluster-1-headless                   ClusterIP   None             <none>        443/TCP                  47h

/// 仮想cluster
# kubectl get service -A --kubeconfig vcluster.yaml
Handling connection for 9443
NAMESPACE     NAME         TYPE        CLUSTER-IP       EXTERNAL-IP   PORT(S)                  AGE
default       kubernetes   ClusterIP   10.96.161.85     <none>        443/TCP                  47h
kube-system   kube-dns     ClusterIP   10.107.141.148   <none>        53/UDP,53/TCP,9153/TCP   47h
Service Account
こちらは、Ageが違うので同期はされてなさそうです。
/// host cluster
# kubectl get sa -A
NAMESPACE          NAME                                 SECRETS   AGE
default            default                              1         119d
host-namespace-1   default                              1         47h
kube-node-lease    default                              1         119d
kube-public        default                              1         119d
kube-system        attachdetach-controller              1         119d
kube-system        bootstrap-signer                     1         119d
kube-system        certificate-controller               1         119d
kube-system        clusterrole-aggregation-controller   1         119d
kube-system        coredns                              1         119d
kube-system        cronjob-controller                   1         119d
kube-system        daemon-set-controller                1         119d
kube-system        default                              1         119d
kube-system        deployment-controller                1         119d
kube-system        disruption-controller                1         119d
kube-system        endpoint-controller                  1         119d
kube-system        endpointslice-controller             1         119d
kube-system        endpointslicemirroring-controller    1         119d
kube-system        expand-controller                    1         119d
kube-system        generic-garbage-collector            1         119d
kube-system        horizontal-pod-autoscaler            1         119d
kube-system        job-controller                       1         119d
kube-system        kube-proxy                           1         119d
kube-system        namespace-controller                 1         119d
kube-system        node-controller                      1         119d
kube-system        persistent-volume-binder             1         119d
kube-system        pod-garbage-collector                1         119d
kube-system        pv-protection-controller             1         119d
kube-system        pvc-protection-controller            1         119d
kube-system        replicaset-controller                1         119d
kube-system        replication-controller               1         119d
kube-system        resourcequota-controller             1         119d
kube-system        root-ca-cert-publisher               1         119d
kube-system        service-account-controller           1         119d
kube-system        service-controller                   1         119d
kube-system        statefulset-controller               1         119d
kube-system        storage-provisioner                  1         119d
kube-system        token-cleaner                        1         119d
kube-system        ttl-controller                       1         119d
vcluster-system    default                              1         47h
vcluster-system    vcluster-1                           1         47h

/// 仮想cluster
# kubectl get sa -A --kubeconfig vcluster.yaml
NAMESPACE         NAME                                 SECRETS   AGE
kube-system       pv-protection-controller             1         47h
kube-system       endpoint-controller                  1         47h
kube-system       daemon-set-controller                1         47h
kube-system       coredns                              1         47h
kube-system       service-controller                   1         47h
kube-system       job-controller                       1         47h
kube-system       disruption-controller                1         47h
kube-system       certificate-controller               1         47h
kube-system       clusterrole-aggregation-controller   1         47h
kube-system       pvc-protection-controller            1         47h
kube-system       endpointslice-controller             1         47h
kube-system       replication-controller               1         47h
kube-system       resourcequota-controller             1         47h
kube-system       namespace-controller                 1         47h
kube-system       horizontal-pod-autoscaler            1         47h
kube-system       statefulset-controller               1         47h
kube-system       pod-garbage-collector                1         47h
kube-system       deployment-controller                1         47h
kube-system       cronjob-controller                   1         47h
kube-system       ttl-controller                       1         47h
kube-system       endpointslicemirroring-controller    1         47h
kube-system       service-account-controller           1         47h
kube-system       generic-garbage-collector            1         47h
kube-system       replicaset-controller                1         47h
kube-system       default                              1         47h
kube-public       default                              1         47h
default           default                              1         47h
kube-node-lease   default                              1         47h
demo1             default                              1         7m19s
Node
Nodeは面白くて、Fake Kubernetes ImageというOS Imageを使ってるというように表記されてます。
# kubectl get node -A --kubeconfig vcluster.yaml -o wide
NAME                   STATUS   ROLES    AGE   VERSION   INTERNAL-IP       EXTERNAL-IP   OS-IMAGE                KERNEL-VERSION      CONTAINER-RUNTIME
minikube.mydom.local   Ready    <none>   47h   v1.19.1   192.124.212.254   <none>        Fake Kubernetes Image   4.19.76-fakelinux   docker://19.3.12

# kubectl get nodes -o wide
NAME                   STATUS   ROLES                  AGE    VERSION   INTERNAL-IP     EXTERNAL-IP   OS-IMAGE                KERNEL-VERSION          CONTAINER-RUNTIME
minikube.mydom.local   Ready    control-plane,master   119d   v1.20.0   [node IP]       <none>        CentOS Linux 7 (Core)   3.10.0-957.el7.x86_64   docker://20.10.2
終わりに
一つのnamespaceに集約できるので、Resource Quotaを用いて簡単に、リソース制御ができるのはいいですね!
デモ環境を渡してあげたりとかが簡単にできると思うので、ぜひ使ってみてください。
Zalando ~ installation ~
Zalando
Zalandoとは、Kubernetes 上に HA 構成の PostgreSQL クラスタを構築するための Operatorです。 S3などを用いたバックアップなども可能になっています。
今回は簡単にインストールから実際に動くまでをご紹介させていただきます。
Zalando Operatorのデプロイ
まず、Gitレポジトリをクローンしてきます。
# git clone https://github.com/zalando/postgres-operator.git
# cd postgres-operator
それでは、Zalando Operatorをインストールしてきます。
Namespace
# kubectl create ns postgres
namespace/postgresql created
Configmap
# kubectl create -f manifests/configmap.yaml -n postgres
configmap/postgres-operator created
プライベートレジストリーからimageをpullする場合はdocker_image (1番下)を変更します。
apiVersion: v1
kind: ConfigMap
metadata:
  name: postgres-operator
data:
  # additional_secret_mount: "some-secret-name"
  # additional_secret_mount_path: "/some/dir"
  api_port: "8080"
  aws_region: eu-central-1
  cluster_domain: cluster.local
  cluster_history_entries: "1000"
  cluster_labels: application:spilo
  cluster_name_label: cluster-name
  # custom_service_annotations: "keyx:valuez,keya:valuea"
  # custom_pod_annotations: "keya:valuea,keyb:valueb"
  db_hosted_zone: db.example.com
  debug_logging: "true"
  # default_cpu_limit: "1"
  # default_cpu_request: 100m
  # default_memory_limit: 500Mi
  # default_memory_request: 100Mi
  # docker_image: registry.opensource.zalan.do/acid/spilo-12:1.6-p2
  docker_image: harbor.pks.local/postgres/container:1.6-p2
RBAC設定
operator-service-account-rbac.yamlのnamespaceがdefaultになっているので書き換えます。
# vi operator-service-account-rbac.yaml
◯ 1か所目
apiVersion: v1
kind: ServiceAccount
metadata:
  name: postgres-operator
  namespace: postgres

◯ 2か所目
apiVersion: rbac.authorization.k8s.io/v1
kind: ClusterRoleBinding
metadata:
  name: postgres-operator
roleRef:
  apiGroup: rbac.authorization.k8s.io
  kind: ClusterRole
  name: postgres-operator
subjects:
- kind: ServiceAccount
  name: postgres-operator
  namespace: postgres
それでは作成していきます。
# kubectl create -f manifests/operator-service-account-rbac.yaml
serviceaccount/postgres-operator created
clusterrole.rbac.authorization.k8s.io/postgres-operator created
clusterrolebinding.rbac.authorization.k8s.io/postgres-operator created
clusterrole.rbac.authorization.k8s.io/postgres-pod created
Operator
必要に応じて、imageをプライベートレジストリーに変えてください。
# kubectl create -f manifests/postgres-operator.yaml -n postgres
deployment.apps/postgres-operator created

$ kubectl create -f manifests/api-service.yaml -n postgres
service/postgres-operator created


# kubectl get all
NAME                                     READY   STATUS    RESTARTS   AGE
pod/postgres-operator-6fbd4d876c-bqvpg   1/1     Running   0          10m


NAME                        TYPE        CLUSTER-IP       EXTERNAL-IP   PORT(S)    AGE
service/postgres-operator   ClusterIP   10.100.200.157   <none>        8080/TCP   10s


NAME                                READY   UP-TO-DATE   AVAILABLE   AGE
deployment.apps/postgres-operator   1/1     1            1           5h3m

NAME                                           DESIRED   CURRENT   READY   AGE
replicaset.apps/postgres-operator-6fbd4d876c   1         1         1       5h3m
Zalando Operator UIのデプロイ
以下、3つのmanifestのNamespaceを変更して、適用していきます。
Service Account
# vi ui/manifests/ui-service-account-rbac.yaml
◯ 1か所目
apiVersion: v1
kind: ServiceAccount
metadata:
  name: postgres-operator-ui
  namespace: postgres


◯ 2か所目
apiVersion: rbac.authorization.k8s.io/v1
kind: ClusterRoleBinding
metadata:
  name: postgres-operator-ui
roleRef:
  apiGroup: rbac.authorization.k8s.io
  kind: ClusterRole
  name: postgres-operator-ui
subjects:
- kind: ServiceAccount
  name: postgres-operator-ui
  namespace: postgres


# kubectl apply -f ui/manifests/ui-service-account-rbac.yaml
serviceaccount/postgres-operator-ui created
clusterrole.rbac.authorization.k8s.io/postgres-operator-ui created
clusterrolebinding.rbac.authorization.k8s.io/postgres-operator-ui created
Deployment
Deployment の namespaceをpostgresに書き換えます。 ※必要に応じてimage をPrivate Repositoryのものに書き換えてください。
# kubectl apply -f ui/manifests/deployment.yaml
deployment.apps/postgres-operator-ui created
Service
以下の様に書き換えて、適用します。
apiVersion: "v1"
kind: "Service"
metadata:
  name: "postgres-operator-ui"
  namespace: "postgres"
  labels:
    application: "postgres-operator-ui"
spec:
  type: "LoadBalancer"
  selector:
    application: "postgres-operator-ui"
  ports:
    - port: 80
      protocol: "TCP"
      targetPort: 8081


# kubectl apply -f ui/manifests/service.yaml
service/postgres-operator-ui created
ここまでで、以下のようになっています。
# kubectl get all
NAME                                        READY   STATUS    RESTARTS   AGE
pod/postgres-operator-6fbd4d876c-bqvpg      1/1     Running   0          71m
pod/postgres-operator-ui-776899996c-ln9q5   1/1     Running   0          81s


NAME                           TYPE           CLUSTER-IP       EXTERNAL-IP     PORT(S)        AGE
service/postgres-operator      ClusterIP      10.100.200.157   <none>          8080/TCP       61m
service/postgres-operator-ui   LoadBalancer   10.100.200.147   <External IP>   80:31474/TCP   7s


NAME                                   READY   UP-TO-DATE   AVAILABLE   AGE
deployment.apps/postgres-operator      1/1     1            1           6h4m
deployment.apps/postgres-operator-ui   1/1     1            1           81s

NAME                                              DESIRED   CURRENT   READY   AGE
replicaset.apps/postgres-operator-6fbd4d876c      1         1         1       6h4m
replicaset.apps/postgres-operator-ui-776899996c   1         1         1       81s
それではGUIにアクセスしていきます。

PostgreSQL Clusterの作成
GUIからの「Create cluster」では、Namaspaceがdefaultなので、 Cluster YAML definitionのmanifestをコピーし、CLIから作成していきます。
# vi postgres-manifest.yaml

kind: "postgresql"
apiVersion: "acid.zalan.do/v1"
metadata:
  name: "acid-my-cluster"
  namespace: postgres
  labels:
    team: acid
spec:
  teamId: "acid"
  postgresql:
    version: "13"
  numberOfInstances: 2
  enableMasterLoadBalancer: true
  volume:
    size: "30Gi"
  resources:
    requests:
      cpu: 100m
      memory: 100Mi
    limits:
      cpu: 500m
      memory: 500Mi


# kubectl apply -f postgres-manifest.yaml
postgresql.acid.zalan.do/acid-my-cluster created

#kubectl get pods,svc
NAME                                        READY   STATUS    RESTARTS   AGE
pod/acid-my-cluster-0                       1/1     Running   0          7m2s
pod/acid-my-cluster-1                       1/1     Running   0          6m9s
pod/postgres-operator-76b5fd66d-lf758       1/1     Running   0          27m
pod/postgres-operator-ui-5478dcfd7b-4cp6h   1/1     Running   0          21m

NAME                             TYPE           CLUSTER-IP     EXTERNAL-IP       PORT(S)          AGE
service/acid-my-cluster          LoadBalancer   10.3.242.170   <External IP>     5432:30043/TCP   7m2s
service/acid-my-cluster-config   ClusterIP      None           <none>            <none>           6m6s
service/acid-my-cluster-repl     ClusterIP      10.3.241.48    <none>            5432/TCP         7m2s
service/postgres-operator        ClusterIP      10.3.255.23    <none>            8080/TCP         19m
service/postgres-operator-ui     LoadBalancer   10.3.243.36    <External IP>    80:32504/TCP     22m
では、アクセスしてみます。
# kubectl exec -it pod/acid-my-cluster-0 -- psql -U postgres
psql (13.1 (Ubuntu 13.1-1.pgdg18.04+1))
Type "help" for help.

postgres=#
データの挿入
実際にデータを書き込んでみます。
postgres=# create database hatest;
CREATE DATABASE
postgres=# \c hatest
You are now connected to database "hatest" as user "postgres".
hatest=#
hatest=# create table hatest (name text);
CREATE TABLE
hatest=# insert into hatest values ('test');
INSERT 0 1
hatest=# select * from hatest;
 name
------
 test
(1 row)
Replica側から書き込みをしてみます。
# kubectl exec -it pod/acid-my-cluster-1 -- psql -U postgres
psql (13.1 (Ubuntu 13.1-1.pgdg18.04+1))
Type "help" for help.

postgres=#
postgres=# \c hatest
You are now connected to database "hatest" as user "postgres".
hatest=#
hatest=# select * from hatest;
 name
------
 test
(1 row)

hatest=#
hatest=# insert into hatest values ('test2');
ERROR:  cannot execute INSERT in a read-only transaction
参照はできましたが、書き込みができないことを確認することができました。
kubedb ~ Continuous Archiving with WAL-G and Restore ~
はじめに
今回第三回ということで、前回までの記事をまだお読みで無い方は、下記を読んでいただけたらと思います!
Continuous Archiving with WAL-G
PostgreSQLではデータ書き込みに先立ってWALファイルに変更内容を書き出して行きます。 このWALファイルをMinIOに送って行きます。
Cluster作成時にこちらの設定をして行きます。
前回同様、MinIOを使うためのSecretを作成して行きます。
# echo -n 'minioadmin' > AWS_ACCESS_KEY_ID
# echo -n 'minioadmin' > AWS_SECRET_ACCESS_KEY
# kubectl create secret generic s3-secret \
    --from-file=./AWS_ACCESS_KEY_ID \
    --from-file=./AWS_SECRET_ACCESS_KEY
secret "s3-secret" created
manifestを作成して行きます。
WALファイルを保存する先をarchiverで記述して行きます。
# vi pg-wal.yaml

apiVersion: kubedb.com/v1alpha1
kind: Postgres
metadata:
  name: wal-postgres
  namespace: postgres
spec:
  version: "11.1-v2"
  replicas: 2
  updateStrategy:
    type: RollingUpdate
  storage:
    storageClassName: "openebs-hostpath"
    accessModes:
      - ReadWriteOnce
    resources:
      requests:
        storage: 1Gi
  archiver:
    storage:
      storageSecretName: s3-secret
      s3:
        bucket: waltest
        endpoint: <URL of MinIO>
それでは、適用して行きます。
# kubectl apply -f pg-wal.yaml
postgres.kubedb.com/wal-postgres created
確認して行きます。
# kubectl get pods
NAME                 READY   STATUS    RESTARTS   AGE
pod/wal-postgres-0   1/1     Running   0          13m
pod/wal-postgres-1   1/1     Running   0          13m
では、MinIOを見て行きます。


中にはたくさんのfileが入っています。

Restore
それでは、Restore検証をしていきます。
データの書き込み
直接アクセスして書き込んでいきます。
# kubectl exec -it wal-postgres-0 -- psql -U postgres
psql (11.1)
Type "help" for help.
postgres=#

postgres=# create database waltest;

postgres=# \c waltest

waltest=# create table waltest (a text);

waltest=# insert into waltest values ('before restore');

waltest=# select * from waltest;
       a
----------------
 before restore
(1 row)
Initialize
では、さっそくInitializeしていきます。
# vi pg-fromwal.yaml

apiVersion: kubedb.com/v1alpha1
kind: Postgres
metadata:
  name: restored-postgres-wal
  namespace: postgres
spec:
  version: "11.1-v2"
  replicas: 2
  databaseSecret:
    secretName: wal-postgres-minio-auth
  storage:
    storageClassName: "openebs-hostpath"
    accessModes:
      - ReadWriteOnce
    resources:
      requests:
        storage: 1Gi
  init:
    postgresWAL:
      storageSecretName: s3-secret
      s3:
        bucket: waltest
        prefix: "kubedb/demo/wal-postgres-minio/archive"
        endpoint: <URL of MinIO>
applyしていきます。
# kubectl apply -f pg-fromwal.yaml
postgres.kubedb.com/restored-postgres-wal created
では、作成されたかを確認していきます。
# kubectl get pods -n postgres
NAME                      READY   STATUS    RESTARTS   AGE
restored-postgres-wal-0   1/1     Running   0          3m3s
restored-postgres-wal-1   1/1     Running   1          2m57s
wal-postgres-0            1/1     Running   0          20m
wal-postgres-1            1/1     Running   0          20m

# kubectl get svc
NAME                             TYPE        CLUSTER-IP       EXTERNAL-IP   PORT(S)    AGE
kubedb                           ClusterIP   None             <none>        <none>     23m
restored-postgres-wal            ClusterIP   10.100.200.118   <none>        5432/TCP   3m18s
restored-postgres-wal-replicas   ClusterIP   10.100.200.49    <none>        5432/TCP   3m18s
wal-postgres                     ClusterIP   10.100.200.12    <none>        5432/TCP   23m
wal-postgres-replicas            ClusterIP   10.100.200.199   <none>        5432/TCP   23m
それでは、確認していきます。
# kubectl exec -it restored-postgres-wal-0 -- psql -U postgres
psql (11.1)
Type "help" for help.
postgres=#

postgres=# \c waltest
You are now connected to database "waltest" as user "postgres".

waltest=# select * from waltest;
       a
----------------
 before restore
(1 row)
ちゃんと書き込んだ内容が反映されたPostgreSQLが作成されたことを確認することができました。
終わりに
- Kubedbのインストール
- Kubedbにおいて、Snapshotを作成し、そのSnapshotを元に新しいPostgreSQLを作成する。
- PostgreSQLのWALファイルをバックアップし、そのWALを元に新しいPostgreSQLを作成する。
の3つを見てきました。
何かしらのお役に立てたら嬉しいです。
Styra DASを使ってOPAをより簡単に
はじめに
今回は、Qiita: Kubernetes Advent Calendar 2020 その3 23日目の記事です。
今回の題材は、KubeCon NA 2020においてStyraが発表したStyra DAS(Declarative Authorisation Service)のフリーエディションです!
実際に使ってみて、今まで手が出しにくかったOPAが、とても楽に管理できたのでこちらで紹介させていただければと思います。
Styra DAS Free
OPA Installation
まずこちらからアクセスして、登録を行ってください。
登録して少し待つと、以下の画面に行けるようになります。

ここからQuick Startに沿って、Kubernetes Clusterを登録していきます。
まずここで、名前を設定しAdd systemをクリックします。
※ Read-onlyは外しておきましょう。
その後、Quick Startの2. Install Styra OPA on your clusterをクリックします。

次に、各コマンドを入力して、OPAをインストールします。

コマンドで起動を確認します。
% kubectl get all -n styra-system
NAME                                     READY   STATUS    RESTARTS   AGE
pod/datasources-agent-6f96f7d4c9-8z79l   1/1     Running   0          2m34s
pod/opa-7979b56c84-8bdbk                 2/2     Running   0          2m34s
pod/opa-7979b56c84-d6d87                 2/2     Running   0          2m34s
pod/opa-7979b56c84-sbmcd                 2/2     Running   0          2m34s

NAME          TYPE        CLUSTER-IP     EXTERNAL-IP   PORT(S)   AGE
service/opa   ClusterIP   10.103.17.84   <none>        443/TCP   2m34s

NAME                                READY   UP-TO-DATE   AVAILABLE   AGE
deployment.apps/datasources-agent   1/1     1            1           2m34s
deployment.apps/opa                 3/3     3            3           2m34s

NAME                                           DESIRED   CURRENT   READY   AGE
replicaset.apps/datasources-agent-6f96f7d4c9   1         1         1       2m34s
replicaset.apps/opa-7979b56c84                 3         3         3       2m34s
ここで、Quick Startを抜けていきます。
左上のロゴの近くの?マークから、Quick Startを再開することができます。
Validation
ここから、Validationを見ていきたいと思います。
Validationとは、受け取ったリクエストを通すか弾くかを決めるものです。
[Cluster name] > [Validating] > [Rules]に移動します。

Add rulesを選択します。
ここでは、prebuiltのruleが入っています。

今回は、
を設定していきます。

右上のValidateを選択することで、既存のClusterにおいて今回適用するruleに対して違反しているリソースがないかを確認することができます。

各ruleにおいて、現在MonitorとなっているところをEnforceに変更します。

下記コマンドが、現状通ることを確認します。
% kubectl run nginx --image=nginx:latest
pod/nginx created

% kubectl apply -f https://raw.githubusercontent.com/StyraInc/configuration-examples/main/kubernetes/ingresses/non-tls-ingress.yaml
Warning: networking.k8s.io/v1beta1 Ingress is deprecated in v1.19+, unavailable in v1.22+; use networking.k8s.io/v1 Ingress
ingress.networking.k8s.io/example-ingress created
確認ができましたので、下記コマンドにてリソースを削除します。
% kubectl delete pod nginx
pod "nginx" deleted

% kubectl delete -f https://raw.githubusercontent.com/StyraInc/configuration-examples/main/kubernetes/ingresses/non-tls-ingress.yaml
Warning: networking.k8s.io/v1beta1 Ingress is deprecated in v1.19+, unavailable in v1.22+; use networking.k8s.io/v1 Ingress
ingress.networking.k8s.io "example-ingress" deleted
それでは、Publishを押します。
確認が表示されるので、Publish changesを選択します。

それでは、それぞれのruleが設定されたかを確認します。
% kubectl run nginx --image=nginx:latest
Error from server: admission webhook "validating-webhook.openpolicyagent.org" denied the request: Enforced: Resource Pod/default/nginx should not use the 'latest' tag on container image nginx:latest.

% kubectl apply -f https://raw.githubusercontent.com/StyraInc/configuration-examples/main/kubernetes/ingresses/non-tls-ingress.yaml
Warning: networking.k8s.io/v1beta1 Ingress is deprecated in v1.19+, unavailable in v1.22+; use networking.k8s.io/v1 Ingress
Error from server: error when creating "https://raw.githubusercontent.com/StyraInc/configuration-examples/main/kubernetes/ingresses/non-tls-ingress.yaml": admission webhook "validating-webhook.openpolicyagent.org" denied the request: Enforced: Resource Ingress/default/example-ingress should have TLS enabled.
Errorになることが確認できました!
Mutation
Mutationとは、リクエストにに対して、パラメータを追加したり変更したりすることができるものです。
DAS にアクセスし、[Cluster name] > [Mutating] > [Rules]に移動します。

Add rulesを選択します。
ここではValidationと同様に、prebuiltのruleが入っています。
今回は、
- Containers: Add Default Memory Limit
- Containers: Add Default CPU Limit
を追加していきます。
値は、環境に合わせて設定してください。

まず、適用していない場合の状況を確認します。
% kubectl run nginx --image=nginx:1.19.6
pod/nginx created


% kubectl describe pods nginx
Name:         nginx
Namespace:    default
Priority:     0
Node:         minikube/192.168.49.2
Start Time:   Sat, 19 Dec 2020 20:51:24 +0900
Labels:       run=nginx
Annotations:  <none>
Status:       Running
IP:           172.17.0.7
IPs:
  IP:  172.17.0.7
Containers:
  nginx:
    Container ID:   docker://9cfd38b13211ab997d362f59c6849662b50e844c05c6af4392978f167d5234c1
    Image:          nginx:1.19.6
    Image ID:       docker-pullable://nginx@sha256:4cf620a5c81390ee209398ecc18e5fb9dd0f5155cd82adcbae532fec94006fb9
    Port:           <none>
    Host Port:      <none>
    State:          Running
      Started:      Sat, 19 Dec 2020 20:51:29 +0900
    Ready:          True
    Restart Count:  0
    Environment:    <none>
    Mounts:
      /var/run/secrets/kubernetes.io/serviceaccount from default-token-85jn9 (ro)
Conditions:
  Type              Status
  Initialized       True
  Ready             True
  ContainersReady   True
  PodScheduled      True
Volumes:
  default-token-85jn9:
    Type:        Secret (a volume populated by a Secret)
    SecretName:  default-token-85jn9
    Optional:    false
QoS Class:       BestEffort
Node-Selectors:  <none>
Tolerations:     node.kubernetes.io/not-ready:NoExecute op=Exists for 300s
                 node.kubernetes.io/unreachable:NoExecute op=Exists for 300s
Events:
  Type    Reason     Age   From               Message
  ----    ------     ----  ----               -------
  Normal  Scheduled  93s   default-scheduler  Successfully assigned default/nginx to minikube
  Normal  Pulling    92s   kubelet            Pulling image "nginx:1.19.6"
  Normal  Pulled     89s   kubelet            Successfully pulled image "nginx:1.19.6" in 3.5937294s
  Normal  Created    88s   kubelet            Created container nginx
  Normal  Started    88s   kubelet            Started container nginx
リソースを消していきます。
% kubectl delete pod nginx
pod "nginx" deleted
Enforceに移動させ、Publishをクリックして、ruleを適用します。

再度、同じリソースを作成し確認していきます。
% kubectl run nginx --image=nginx:1.19.6
pod/nginx created

% kubectl describe pods nginx
Name:         nginx
Namespace:    default
Priority:     0
Node:         minikube/192.168.49.2
Start Time:   Sat, 19 Dec 2020 20:58:47 +0900
Labels:       run=nginx
Annotations:  <none>
Status:       Running
IP:           172.17.0.7
IPs:
  IP:  172.17.0.7
Containers:
  nginx:
    Container ID:   docker://86d42940ef4206bdee92c88919f4560b8e7f8ccecc105d2e333eb7dcf375114a
    Image:          nginx:1.19.6
    Image ID:       docker-pullable://nginx@sha256:4cf620a5c81390ee209398ecc18e5fb9dd0f5155cd82adcbae532fec94006fb9
    Port:           <none>
    Host Port:      <none>
    State:          Running
      Started:      Sat, 19 Dec 2020 20:58:48 +0900
    Ready:          True
    Restart Count:  0
    Limits:
      cpu:     2
      memory:  100Mi
    Requests:
      cpu:        2
      memory:     100Mi
    Environment:  <none>
    Mounts:
      /var/run/secrets/kubernetes.io/serviceaccount from default-token-85jn9 (ro)
Conditions:
  Type              Status
  Initialized       True
  Ready             True
  ContainersReady   True
  PodScheduled      True
Volumes:
  default-token-85jn9:
    Type:        Secret (a volume populated by a Secret)
    SecretName:  default-token-85jn9
    Optional:    false
QoS Class:       Guaranteed
Node-Selectors:  <none>
Tolerations:     node.kubernetes.io/not-ready:NoExecute op=Exists for 300s
                 node.kubernetes.io/unreachable:NoExecute op=Exists for 300s
Events:
  Type    Reason     Age   From               Message
  ----    ------     ----  ----               -------
  Normal  Scheduled  38s   default-scheduler  Successfully assigned default/nginx to minikube
  Normal  Pulled     37s   kubelet            Container image "nginx:1.19.6" already present on machine
  Normal  Created    37s   kubelet            Created container nginx
  Normal  Started    37s   kubelet            Started container nginx
適用されていることが確認できました!
終わりに
ここまで、簡単にOPAを導入していく方法を見ていきました。
prebuiltのruleを用いることで、とても簡単に制御できることがわかったと思います。
ここまで読んでいただき、ありがとうございました!
引き続き、Cloud Nativeを盛り上げていきましょう!
Appendixとして、自分でregoを書いていく際に役に立つ機能について書かせていただきますので、ぜひこちらも読んでいただけると嬉しいです。
Appendix
Admission Review
これまで、prebuiltのruleを用いてPolicyを作成してきましたが、 実運用をしていく中で、自分でregoを書いてruleを作っていく必要が出てきます。
OPAにおいて、Regoを用いてruleを記述する対象となるのがAdmission Reviewになります。
regoとAdmissoin Reviewの関係は、OPA Playgroundで、簡単に試すことができます。

ただ、あらゆるリソースに対してこのAddmission Reviewを追うのは大変です。
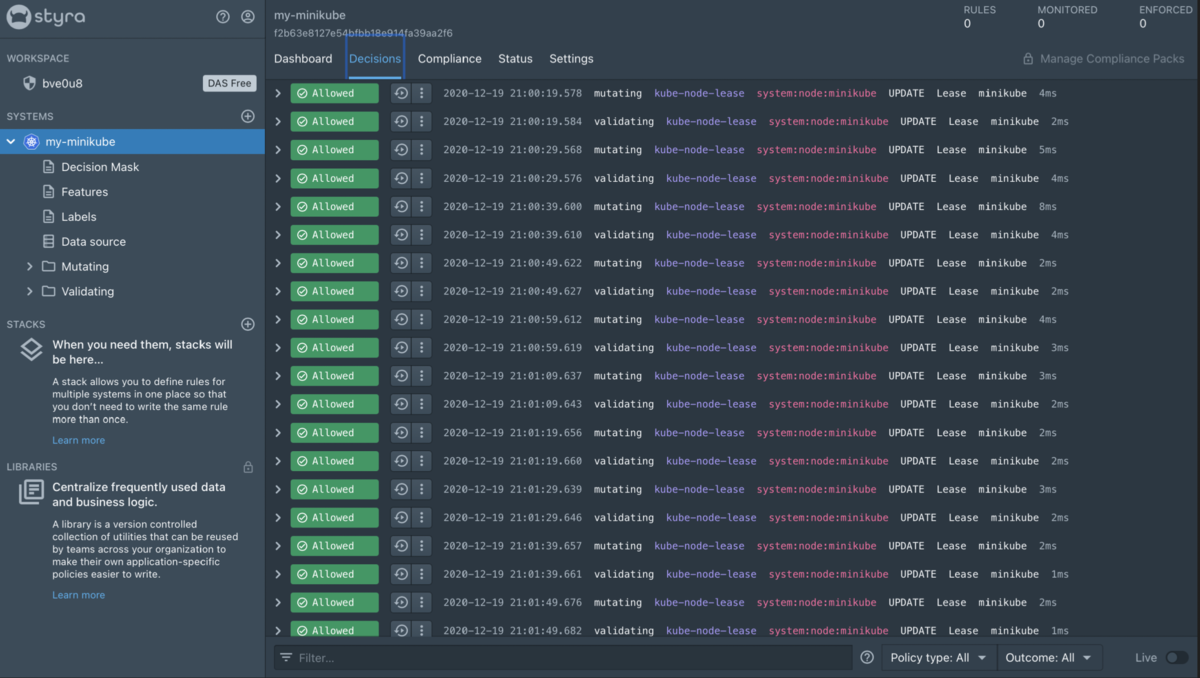
Styra DAS Freeでは、このAddmission ReviewをLogとして記録してくれています。
[Cluster name]を選択し、Decisionsタブを選択することで確認することができます。
今後ruleを適用しようと考えているリソースを作成します。
% kubectl create deployment nginx-deploy --image=nginx:1.19.6
deployment.apps/nginx-deploy created
下のFilterにて、作成したリソース名を入力します。

それでは、実際に作成したDeploymentに対してValidatingを行なっている箇所を選択します。

Inputのところを抜き出します。
Admission Review
"input": {
    "apiVersion": "admission.k8s.io/v1",
    "kind": "AdmissionReview",
    "request": {
      "dryRun": false,
      "kind": {
        "group": "apps",
        "kind": "Deployment",
        "version": "v1"
      },
      "name": "nginx-deploy",
      "namespace": "default",
      "object": {
        "apiVersion": "apps/v1",
        "kind": "Deployment",
        "metadata": {
          "creationTimestamp": "2020-12-19T12:10:57Z",
          "generation": 1,
          "labels": {
            "app": "nginx-deploy"
          },
          "managedFields": [
            {
              "apiVersion": "apps/v1",
              "fieldsType": "FieldsV1",
              "fieldsV1": {
                "f:metadata": {
                  "f:labels": {
                    ".": {},
                    "f:app": {}
                  }
                },
                "f:spec": {
                  "f:progressDeadlineSeconds": {},
                  "f:replicas": {},
                  "f:revisionHistoryLimit": {},
                  "f:selector": {
                    "f:matchLabels": {
                      ".": {},
                      "f:app": {}
                    }
                  },
                  "f:strategy": {
                    "f:rollingUpdate": {
                      ".": {},
                      "f:maxSurge": {},
                      "f:maxUnavailable": {}
                    },
                    "f:type": {}
                  },
                  "f:template": {
                    "f:metadata": {
                      "f:labels": {
                        ".": {},
                        "f:app": {}
                      }
                    },
                    "f:spec": {
                      "f:containers": {
                        "k:{\"name\":\"nginx\"}": {
                          ".": {},
                          "f:image": {},
                          "f:imagePullPolicy": {},
                          "f:name": {},
                          "f:resources": {},
                          "f:terminationMessagePath": {},
                          "f:terminationMessagePolicy": {}
                        }
                      },
                      "f:dnsPolicy": {},
                      "f:restartPolicy": {},
                      "f:schedulerName": {},
                      "f:securityContext": {},
                      "f:terminationGracePeriodSeconds": {}
                    }
                  }
                }
              },
              "manager": "kubectl-create",
              "operation": "Update",
              "time": "2020-12-19T12:10:57Z"
            }
          ],
          "name": "nginx-deploy",
          "namespace": "default",
          "uid": "8d27da1b-c9cb-4453-ba5e-d79f051fdb48"
        },
        "spec": {
          "progressDeadlineSeconds": 600,
          "replicas": 1,
          "revisionHistoryLimit": 10,
          "selector": {
            "matchLabels": {
              "app": "nginx-deploy"
            }
          },
          "strategy": {
            "rollingUpdate": {
              "maxSurge": "25%",
              "maxUnavailable": "25%"
            },
            "type": "RollingUpdate"
          },
          "template": {
            "metadata": {
              "creationTimestamp": null,
              "labels": {
                "app": "nginx-deploy"
              }
            },
            "spec": {
              "containers": [
                {
                  "image": "nginx:1.19.6",
                  "imagePullPolicy": "IfNotPresent",
                  "name": "nginx",
                  "resources": {},
                  "terminationMessagePath": "/dev/termination-log",
                  "terminationMessagePolicy": "File"
                }
              ],
              "dnsPolicy": "ClusterFirst",
              "restartPolicy": "Always",
              "schedulerName": "default-scheduler",
              "securityContext": {},
              "terminationGracePeriodSeconds": 30
            }
          }
        },
        "status": {}
      },
      "oldObject": null,
      "operation": "CREATE",
      "options": {
        "apiVersion": "meta.k8s.io/v1",
        "fieldManager": "kubectl-create",
        "kind": "CreateOptions"
      },
      "requestKind": {
        "group": "apps",
        "kind": "Deployment",
        "version": "v1"
      },
      "requestResource": {
        "group": "apps",
        "resource": "deployments",
        "version": "v1"
      },
      "resource": {
        "group": "apps",
        "resource": "deployments",
        "version": "v1"
      },
      "uid": "1040a718-e0c6-47ec-93c2-514d55c41d37",
      "userInfo": {
        "groups": [
          "system:masters",
          "system:authenticated"
        ],
        "username": "minikube-user"
      }
    }
  },
これが、Inputとして入ってきたAddmission Reviewになります。 OPAはこれに対してruleを用いて、ValidationやMutationを行なっていることが分かります。
Writing Mutating Rule
では、上のリソースに対して実際にruleを書いていきます。
今回はこのようなruleを書いてみました。

Mutating Rule
enforce[decision] {
  #title: Restrict Replica
  input.request.object.kind == "Deployment"

  #   Check if the replica count is more than 2
  input.request.object.spec.replicas > 2

  # As all of the above conditions are true, the request will be updated with
  # the following JSON patch and respective decision will be returned.
  decision := {
    "allowed": true,
    "message": "replacing replicas",
    "patch": [
      {
        "op": "replace",
        "path": "/spec/replicas",
        "value": 2
      }
    ]
  }
}
内容としては、replica数が2より大きい場合に、replica数を2に書き換えるという内容になっています。
では、コマンドで確認していきたいと思います。
% kubectl create deployment nginx-deploy --image=nginx:1.19.6 --replicas=5
deployment.apps/nginx-deploy created

 % kubectl get pods
NAME                            READY   STATUS    RESTARTS   AGE
nginx-deploy-5dbf8f84ff-29lbm   1/1     Running   0          7s
nginx-deploy-5dbf8f84ff-rh54m   1/1     Running   0          7s
replicaを5にしているにもかかわらず、ちゃんとreplicaが2として生成されました。
DASにおいても、Adviceという項目でMutationが実施されたことを確認できます。

まだ、regoを完全に理解できているわけではないので、分かっていない部分ではありますが、
一般的なOPAを使う時とDASを通して使う時で、regoの文法等は一緒なのですが、表現方法が若干違うように感じました。
この辺り、もっと突き詰めていきたいと思います。
kubedb ~ Backup and Restore with MinIO ~
はじめに
Kubedbのデプロイに関しては、前回の記事を参考にしていただければと思います。
Instant Snapshot
KubeDBオペレーターは、Kubernetes APIを使用してスナップショットオブジェクトを監視します。 スナップショットオブジェクトが作成されると、pg_dumpallコマンドを実行するジョブが起動され、出力SQLファイルがosmを使用してクラウドストレージにアップロードされます。
今回は単発でSnapShotをとる方法を見て行きます。
まず、MinIOを使うためのSecretを用意します。
$ echo -n 'minioadmin' > AWS_ACCESS_KEY_ID
$ echo -n 'minioadmin' > AWS_SECRET_ACCESS_KEY
$ kubectl create secret generic s3-secret \
    --from-file=./AWS_ACCESS_KEY_ID \
    --from-file=./AWS_SECRET_ACCESS_KEY
secret "s3-secret" created
では、もうSnapShotを取って行きます。 manifestでさらっと取れるので感激です!!!
# vi snapshot.yaml

apiVersion: kubedb.com/v1alpha1
kind: Snapshot
metadata:
  name: snapshot-xyz
  labels:
    kubedb.com/kind: Postgres
spec:
  databaseName: quick-postgres
  storageSecretName: s3-secret
  s3:
    endpoint: <URL of MinIO>
    bucket: test
確認して行きます。
# kubectl apply -f snapshot.yaml


# kubectl get snap -n demo
NAME           DATABASENAME     STATUS      AGE
snapshot-xyz   quick-postgres   Succeeded   3m1s
MinIOを確認します。

階層を掘っていくと

スナップショットデータは、次のディレクトリのバックエンドに保存されます。
{bucket}/{prefix}/kubedb/{namespace}/{PostgreSQL name}/{Snapshot name}/
Scheduled Snapshot
続いて、Scheduled Snapehotです。 こちらは、Clusterをデプロイ時に指定します。
先ほどと同様に、Secretを作成してください。
そうしたら、manifestを作成して行きます。
#vi pg-snap.yaml

apiVersion: kubedb.com/v1alpha1
kind: Postgres
metadata:
  name: scheduled-pg
  namespace: demo
spec:
  version: "9.6-v2"
  replicas: 3
  storage:
    storageClassName: "openebs-hostpath"
    accessModes:
    - ReadWriteOnce
    resources:
      requests:
        storage: 1Gi
  backupSchedule:
    cronExpression: "@every 2m"
     storageSecretName: s3-secret
     s3:
      endpoint: <URL of MinIO>
     bucket: schedule-test
Clusterが作成されたことを確認します。
# k get pods
NAME                       READY   STATUS             RESTARTS   AGE
scheduled-pg-0             1/1     Running            0          63s
scheduled-pg-1             1/1     Running            0          111s
scheduled-pg-2             1/1     Running            0          106s
MinIOにもしっかり保存されています。

Restore
これからRestoreの検証をして行きます。
データの書き込み
簡単なデータを書き込んでいきます。
# kubectl exec -it -n postgres nginx-0 bash
root@nginx-0:/# psql -U postgres -h quick-postgres.demo -p 5432
Password for user postgres:
psql (11.7 (Debian 11.7-0+deb10u1), server 10.2)
Type "help" for help.

postgres=#

postgres=# create database restoretest;
postgres=# \c restoretest

restoretest=# create table restoretest (a text);

restoretest=# insert into restoretest values ('before snapshot');

restoretest=# select * from restoretest;
       a
----------------
 before snapshot
(1 row)
Snapshotの作成
Snapshotを作成して行きます。
# vi snapshot.yaml

apiVersion: kubedb.com/v1alpha1
kind: Snapshot
metadata:
  name: restore-test
  labels:
    kubedb.com/kind: Postgres
spec:
  databaseName: quick-postgres
  storageSecretName: s3-secret
  s3:
    endpoint: <URL of MinIO>
    bucket: test
データの追加
再度、データを書き込んでいきます。
restoretest=# select * from restoretest;
       a
----------------
 before snapshot
(1 row)

restoretest=# insert into restoretest values ('after snapshot');

restoretest=# select * from restoretest;
       a
----------------
 before snapshot
 after snapshot
(2 rows)
Restore
それでは、DataをRestoreして行きます。 こちらは、再度違うClusterを作成するという処理になります。
spec.databaseSecret.secretNameは、snapshotを作成したClusterのSecretを用います。
spec.init.snapshotSource.nameは、今回用いるSnapshotを書きます。
# kubedb get snap
NAME            DATABASENAME     STATUS      AGE
restore-test   quick-postgres   Succeeded   149m


# vi pg-recovered.yaml


apiVersion: kubedb.com/v1alpha1
kind: Postgres
metadata:
  name: recovered-postgres
  namespace: demo
spec:
  version: "9.6-v4"
  databaseSecret:
    secretName: quick-postgres-auth
  storage:
    storageClassName: "openebs-hostpath"
    accessModes:
    - ReadWriteOnce
    resources:
      requests:
        storage: 1Gi
  init:
    snapshotSource:
      name: restore-test
      namespace: demo
それでは適用して行きます。
# kubectl apply -f pg-recovered.yaml
dataの確認
DBへアクセスする際は、snapshotを取ったClusterで用いたpasswordを使用します。
postgres=# \c restoretest

restoretest=# select * from restoretest;
        a
-----------------
 before snapshot
(1 row)
注意
0.12台ですが以下のことが稀に起こります。
- Cluster-A

restoretest=# select * from restoretest;
        a
-----------------
 before snapshot
 before snapshot
(2 rows)

- Cluster B (Clsuter Aの後に同様の手順で再度作成したもの)

restoretest=# select * from restoretest;
        a
-----------------
 before snapshot
(1 row)